Home Office

All Posts Containing โ€˜Home Officeโ€™

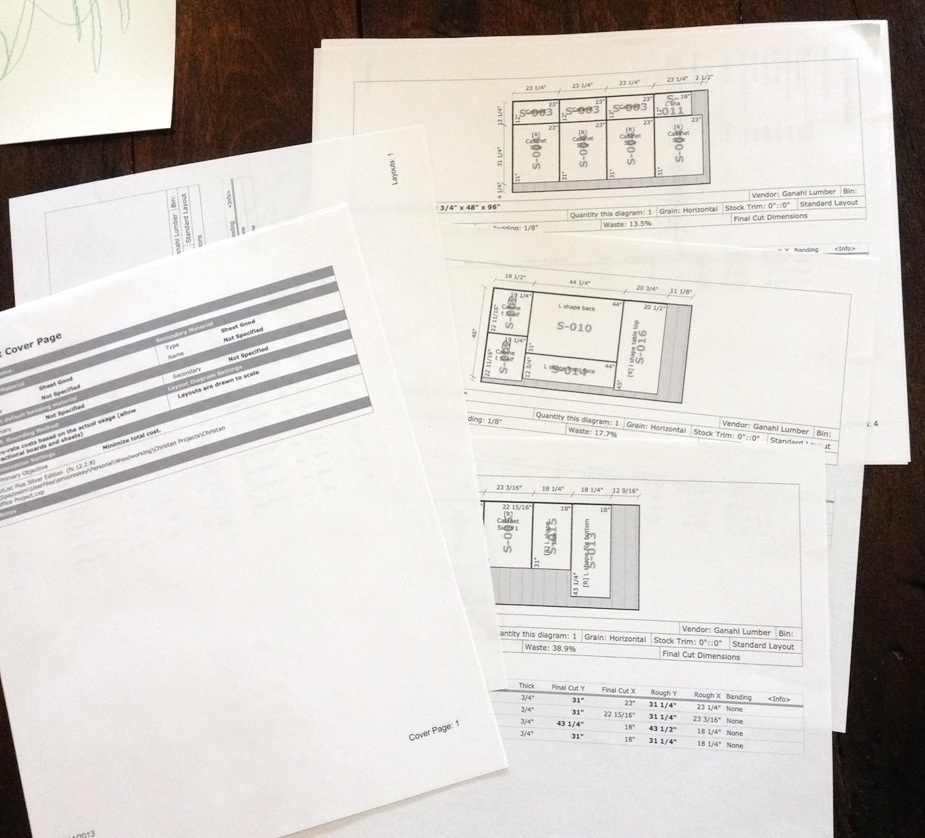
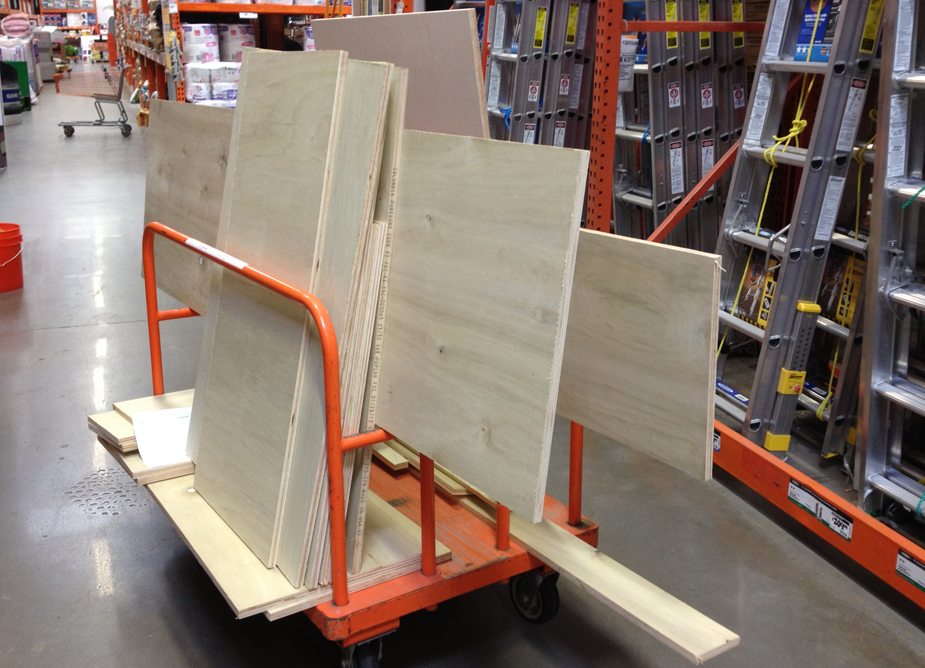
I knew having the cut list print outs and the materials I needed all up front would save me time, but I’m amazed at the time I saved getting my wood and materials! Since all of the cuts were rip cuts, I figured I would utilize Home Depots staff to assist me ๐Ÿ™‚ I wasn’t sure if they would do all of the cuts for me, but I figured it was worth a shot to save even more time…it worked! Their blade made really rough edges so I had to sand them down a little, but I wasn’t going to complain ๐Ÿ™‚


home-office-homedeoptcuts


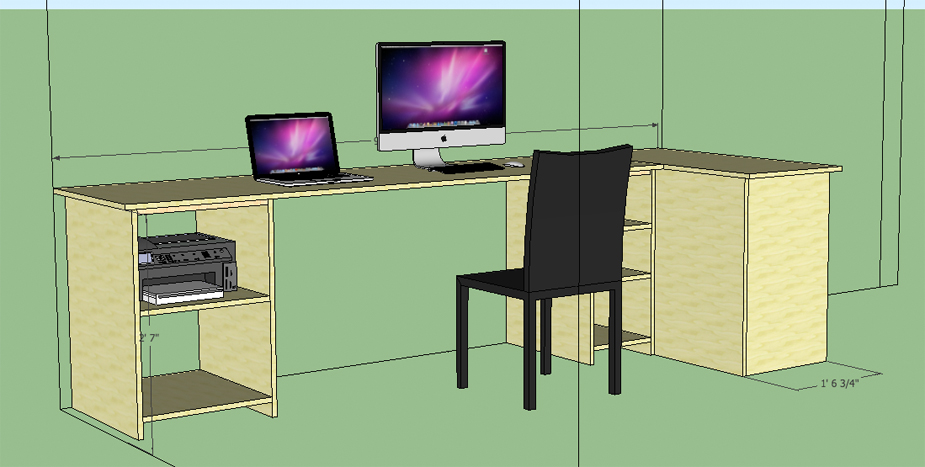
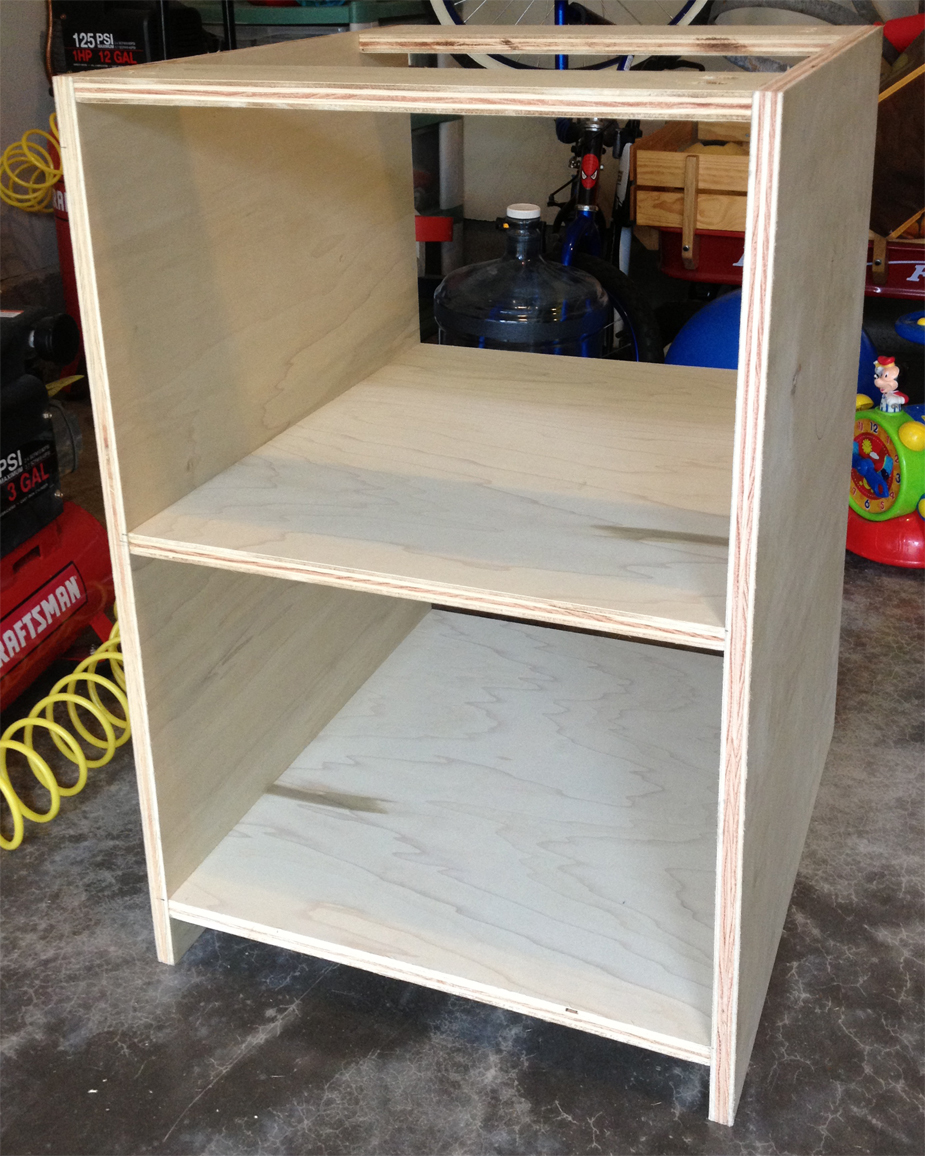
Once I got home, I pulled out my Kreg Jig and began piecing the components together. With plans in hand it was easy because I marked the individual pieces as they were cut so I didn’t have to remeasure anything and just build it. I decided to go with cabinets on either side of the desk (after my cousin suggested for stability) and since I knew how I would use the shelf space, I didn’t see a need to build adjustable shelving for this project.
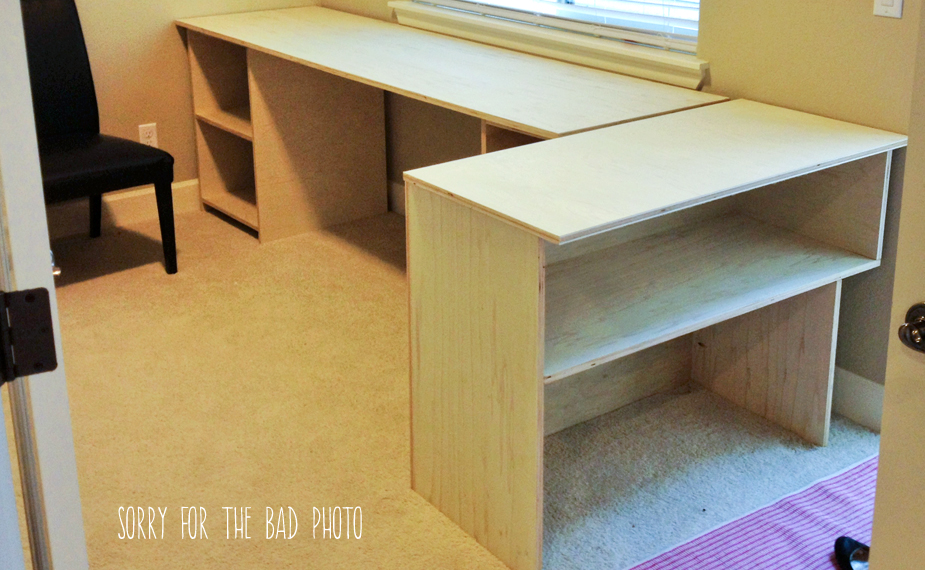
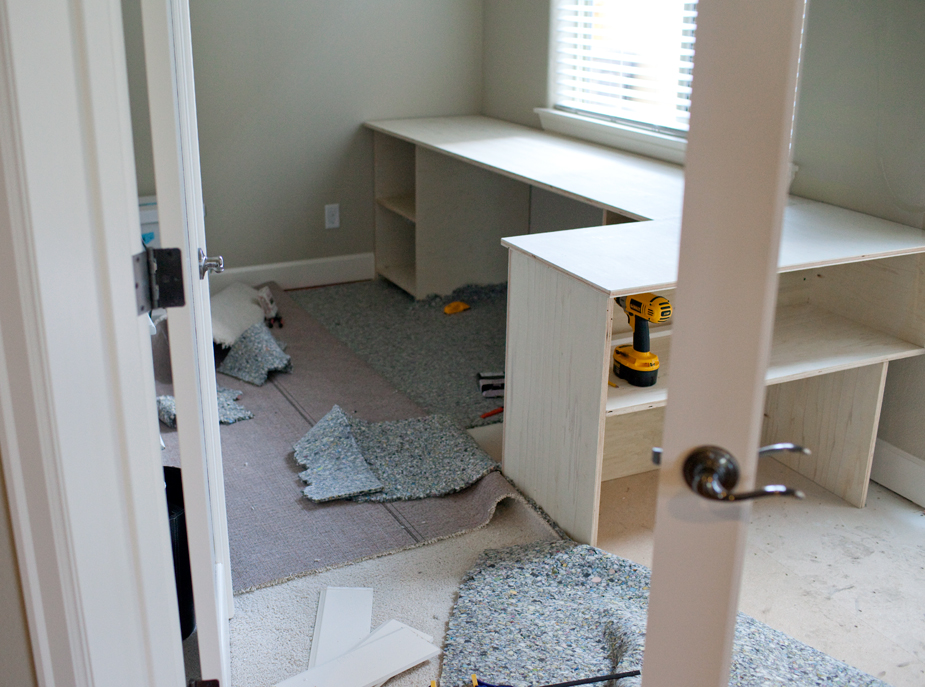

home-office-cabinet


All in Place

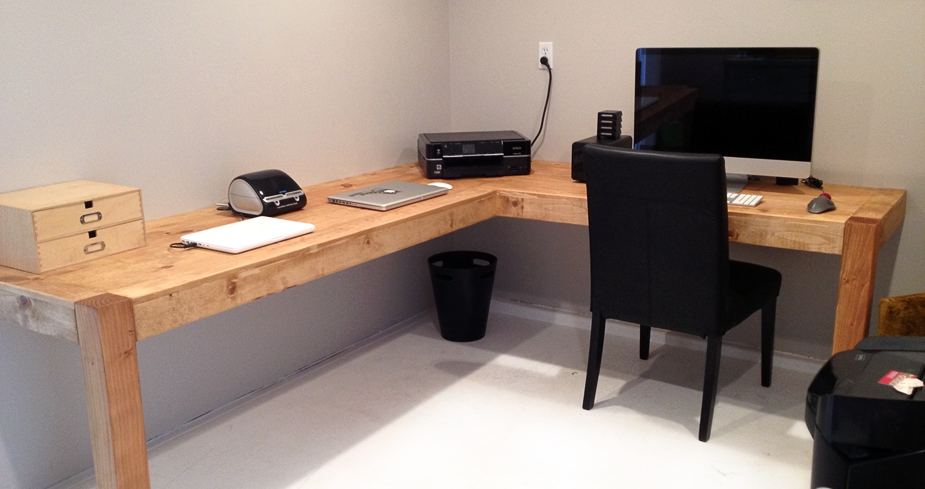
After building all of the pieces I wanted to see how it all looked in place and to assure everything looked good in the room. Luckily everything turned out exactly like my model sketchup and how we wanted!


home-office-allinplace


Pulling Back the Carpet

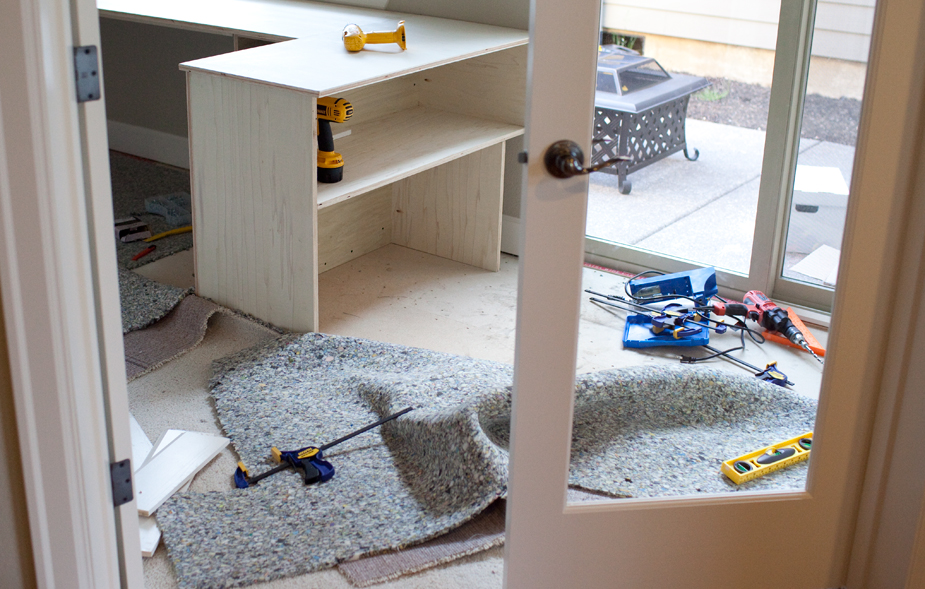
A friend of mine asked me why I pulled the carpet back instead of just building it on top. There were a couple of reasons why: 1. We wanted to make this look custom and as if it were built in with the house. 2. In the long run, if we (or next owners) want to change out the carpet it would be a pain. Pulling back the carpet and building straight on the sub floor was the “right way” to do it.


home-office-carpetpulledback


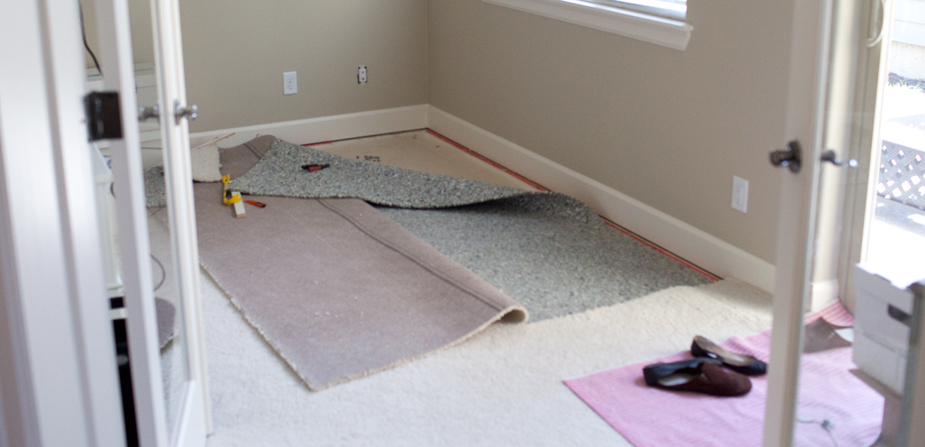
After pulling back the carpet I began building it into place permanently. With the fitting before the carpet pulled back, I knew I could put the measuring tape away and just focus on putting it together.

home-office-carpetpulledback1


home-office-carpetpulledback2


With the desk coming together quickly, I’m going to attempt to make some drawers ๐Ÿ™‚

For the past few months I’ve been increasingly acquiring new clients….which is great, but requires more time sitting at the computer. Normally that wouldn’t be a problem (actually an answer to prayers) but without a desk it means working from the kitchen counter…


home-office-sittingoncounter


At our last house I built my first built-in desk after being inspired from a blog I follow that created a coffee table that resembled the tables at the Apple Store. At that point it was my biggest project so I decided against drawers or shelves and to keep it simple.


ash-st-home-office


With an achy back and a room full of boxes that was just asking for a desk, I started dreaming up solutions. I had an idea what I wanted to build, but (like most projects) I had no idea what I was doing when I started ๐Ÿ™‚


home-office-before


I called my cousin because a few months ago he showed me plans of a closet build out that he was working on. When he showed me the plan, he was telling me how a program allowed him to spec the entire project out before he lifted a hammer. He introduced me to the Google app called “Sketchup“. After 10 minutes of talking with him I was convinced this was the best thing to do to help cut down on wasted material and an excuse to learn something new. After watching a 7 minute video I was able to get started on my project!

home-office-sketchup


There are a ton of tutorials on YouTube so I wont go into the details, but trust me….though this was more work up front, it made the build time much faster.

I also utilized Cut List Pro to minimize the waste in materials. Cut List allows you to input all of your cuts (exported from Sketchup) and gives you a shopping list of materials you need. It also shows you the most efficient way to rip your boards from your material and if you know the cost of things, you can create an estimate for the project. They also have an ipad app.


home-office-cutlistpro


Now that I had my desk designed, cut list in hand and in project mode….I needed to clean up the room so I would have somewhere to put the desk.

Next up, making the cuts, building the components, pulling back the carpet and piecing this thing together!